
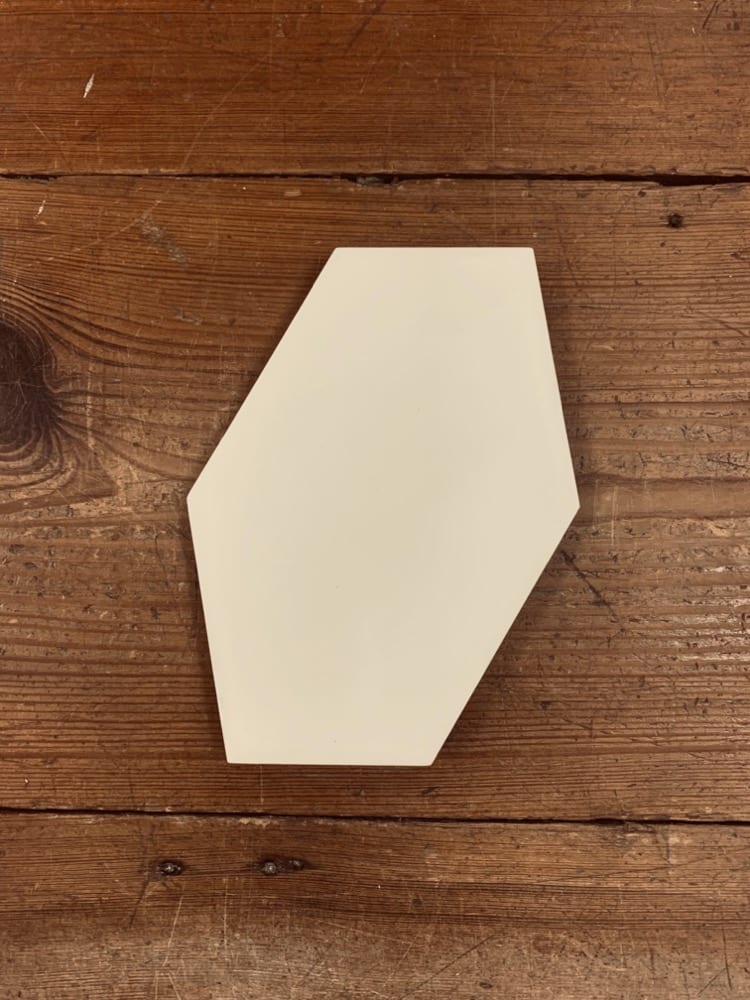
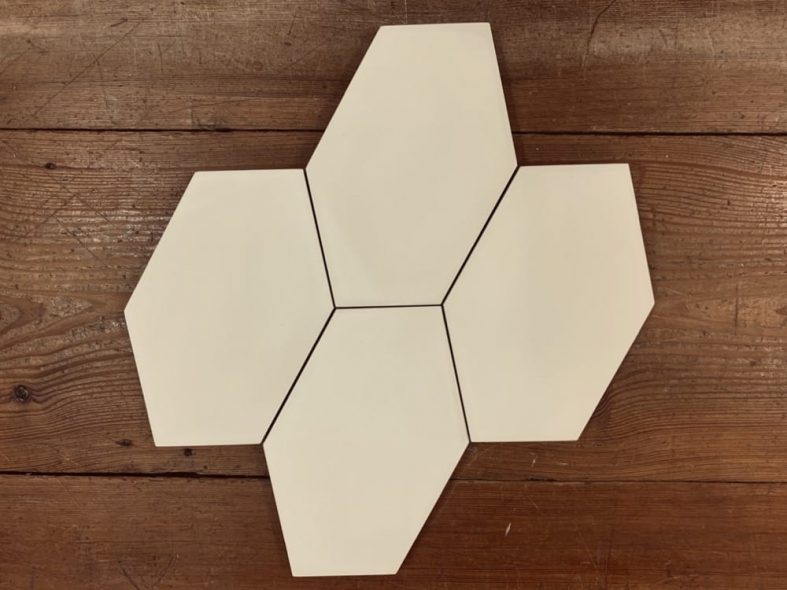

Hexy Chalk
Hexy Chalk has a quiet personality with a unique shape. The perfect neutral designed to play with Hexy Light and Hexy Chalk Terrazzo
3.53sf per box
Please input your needed square footage in the box below. We recommend adding an additional 15% to your actual area to account for overage, cuts and waste.
59 boxes in stock
Architerra Signature Cement tiles are a modern take on a timeless product. With a clean color pallete and contemporary patterns designed to compliment a range of spaces.
Architerra Signature Cement tiles are created using basic earth components—natural pigments mixed with ground marble dust, white portland cement, aggregate and sand. Our cement tiles are made by pouring the materials into a mold, then they are pressed and stacked in a water bath to cure. They are then polished and sealed creating an end result that is a durable, safe and long-lasting tile.
INSTALLATION NOTE
Architerra Signature terrazzo & cement tiles require sealing during the installation process. If this step is not done correctly, staining can begin to occur immediately following installation. Note that certain sealers will darken cement tile colors significantly. Ask your installer to apply sealer options to sample pieces prior to sealing all tile. Please read our Usage + Installation Guide prior to installation.
CEMENT TILE USAGE & INSTALLATION
Our cement and terrazzo tiles are created using basic earth components—natural pigments mixed with ground marble dust, white portland cement, aggregate and sand. Our cement tiles are not manufactured using kilns or other firing process. They are processed in a way that allows them to be free of the energy costs involved in the firing process of ceramic tiles, which typically involves the extensive use of fossil fuels. Our cement tiles are made by pouring the materials into a mold, then they are hydraulically pressed and stacked in a water bath to cure. They are then polished and sealed creating an end result that is a durable, safe and long lasting tile.
Architerra has worked with our partners to provide the finest quality cement tiles available. However, for the best installation, it is important that you hire a highly qualified cement tile contractor for your project. Architerra provides these general guidelines as suggestions to installers. Since applications and job site conditions vary, your installer is ultimately responsible for ensuring proper installation. Architerra will not be responsible for material that has been cut or installed. Installation absolutely deems final acceptance.
USAGE GUIDELINES
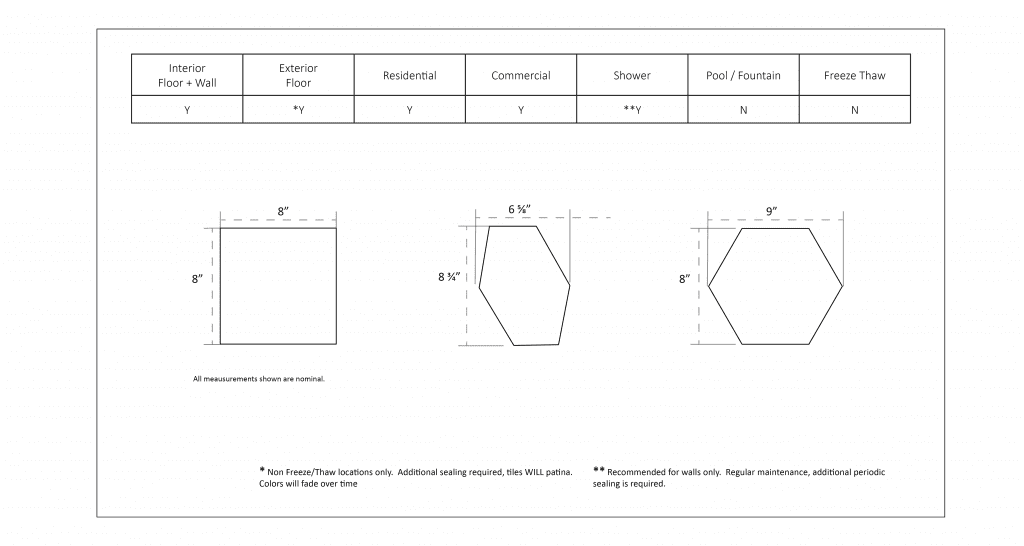
INSPECTIING YOUR TILES
It is important to inspect your tiles before installation. Irregular or chipped edges and cracks in the surface are normal and are to be expected, as are slight variations in thickness and shade. These characteristics add to the natural appeal and in no way compromise the performance of the tile. Due to these natural color and shade variations, it is important to blend your tiles, pulling individual pieces from all boxes available. We highly recommend that you perform a dry layout of your tiles prior to installation.
Industry standard suggests ordering at least 15% overage due to the tile cuts, potential breakage, or future repairs. Add-on orders are not guaranteed to be a match to the original order.
Store your tiles in a protected humidity-controlled area. Do not allow the boxes or tiles to get wet. Moisture and dampness, as well as direct sun exposure, can cause tiles to stain, color to fade, or damage the surface.
Some tiles may exhibit “efflorescence”. This is an inherent, naturally occurring phenomenon in which white powdery marks may be visible on the surface. Efflorescense generally comes off during the installation process, but can also occur after installation. A good cleaning and buffing of the tiles (with a pH neutral cleanser and lightly abrasive green pad) generally resolves the visible presence of efflorescence. To read more about it, click HERE.
PREPARING YOUR SURFACE
Ensure that you are installing your tiles over a perfectly clean, dry, level surface. Be sure to clean any dust or residue from shipping or storage from the surface (and underside) of your tiles before installation.
If installing over a slab, make sure your slab does not contain any residual moisture. Moisture test kits are available online and at most large home stores. If you are unsure how to conduct these tests, we strongly suggest you consult with a qualified cement tile installer before beginning.
To prevent cracking or fracturing in the tiles from the movement of the substrate, the installation of expansion, contraction, construction, isolation and generic/perimeter joints might be necessary. Please consult your architect or engineer.
Our cement and Terrazzo tiles are pre-sealed at the factory to protect the surface during transport. This coating should NOT be used as a substitute to additional sealing during installation, but rather in addition to.
**IMPORTANT – Before installing, make sure to lay out your tile and blend by pulling individual tiles from multiple boxes so that variations in color are where you would like them to be, and are evenly distributed throughout the entire installation. DO NOT install without blending tiles from all boxes.
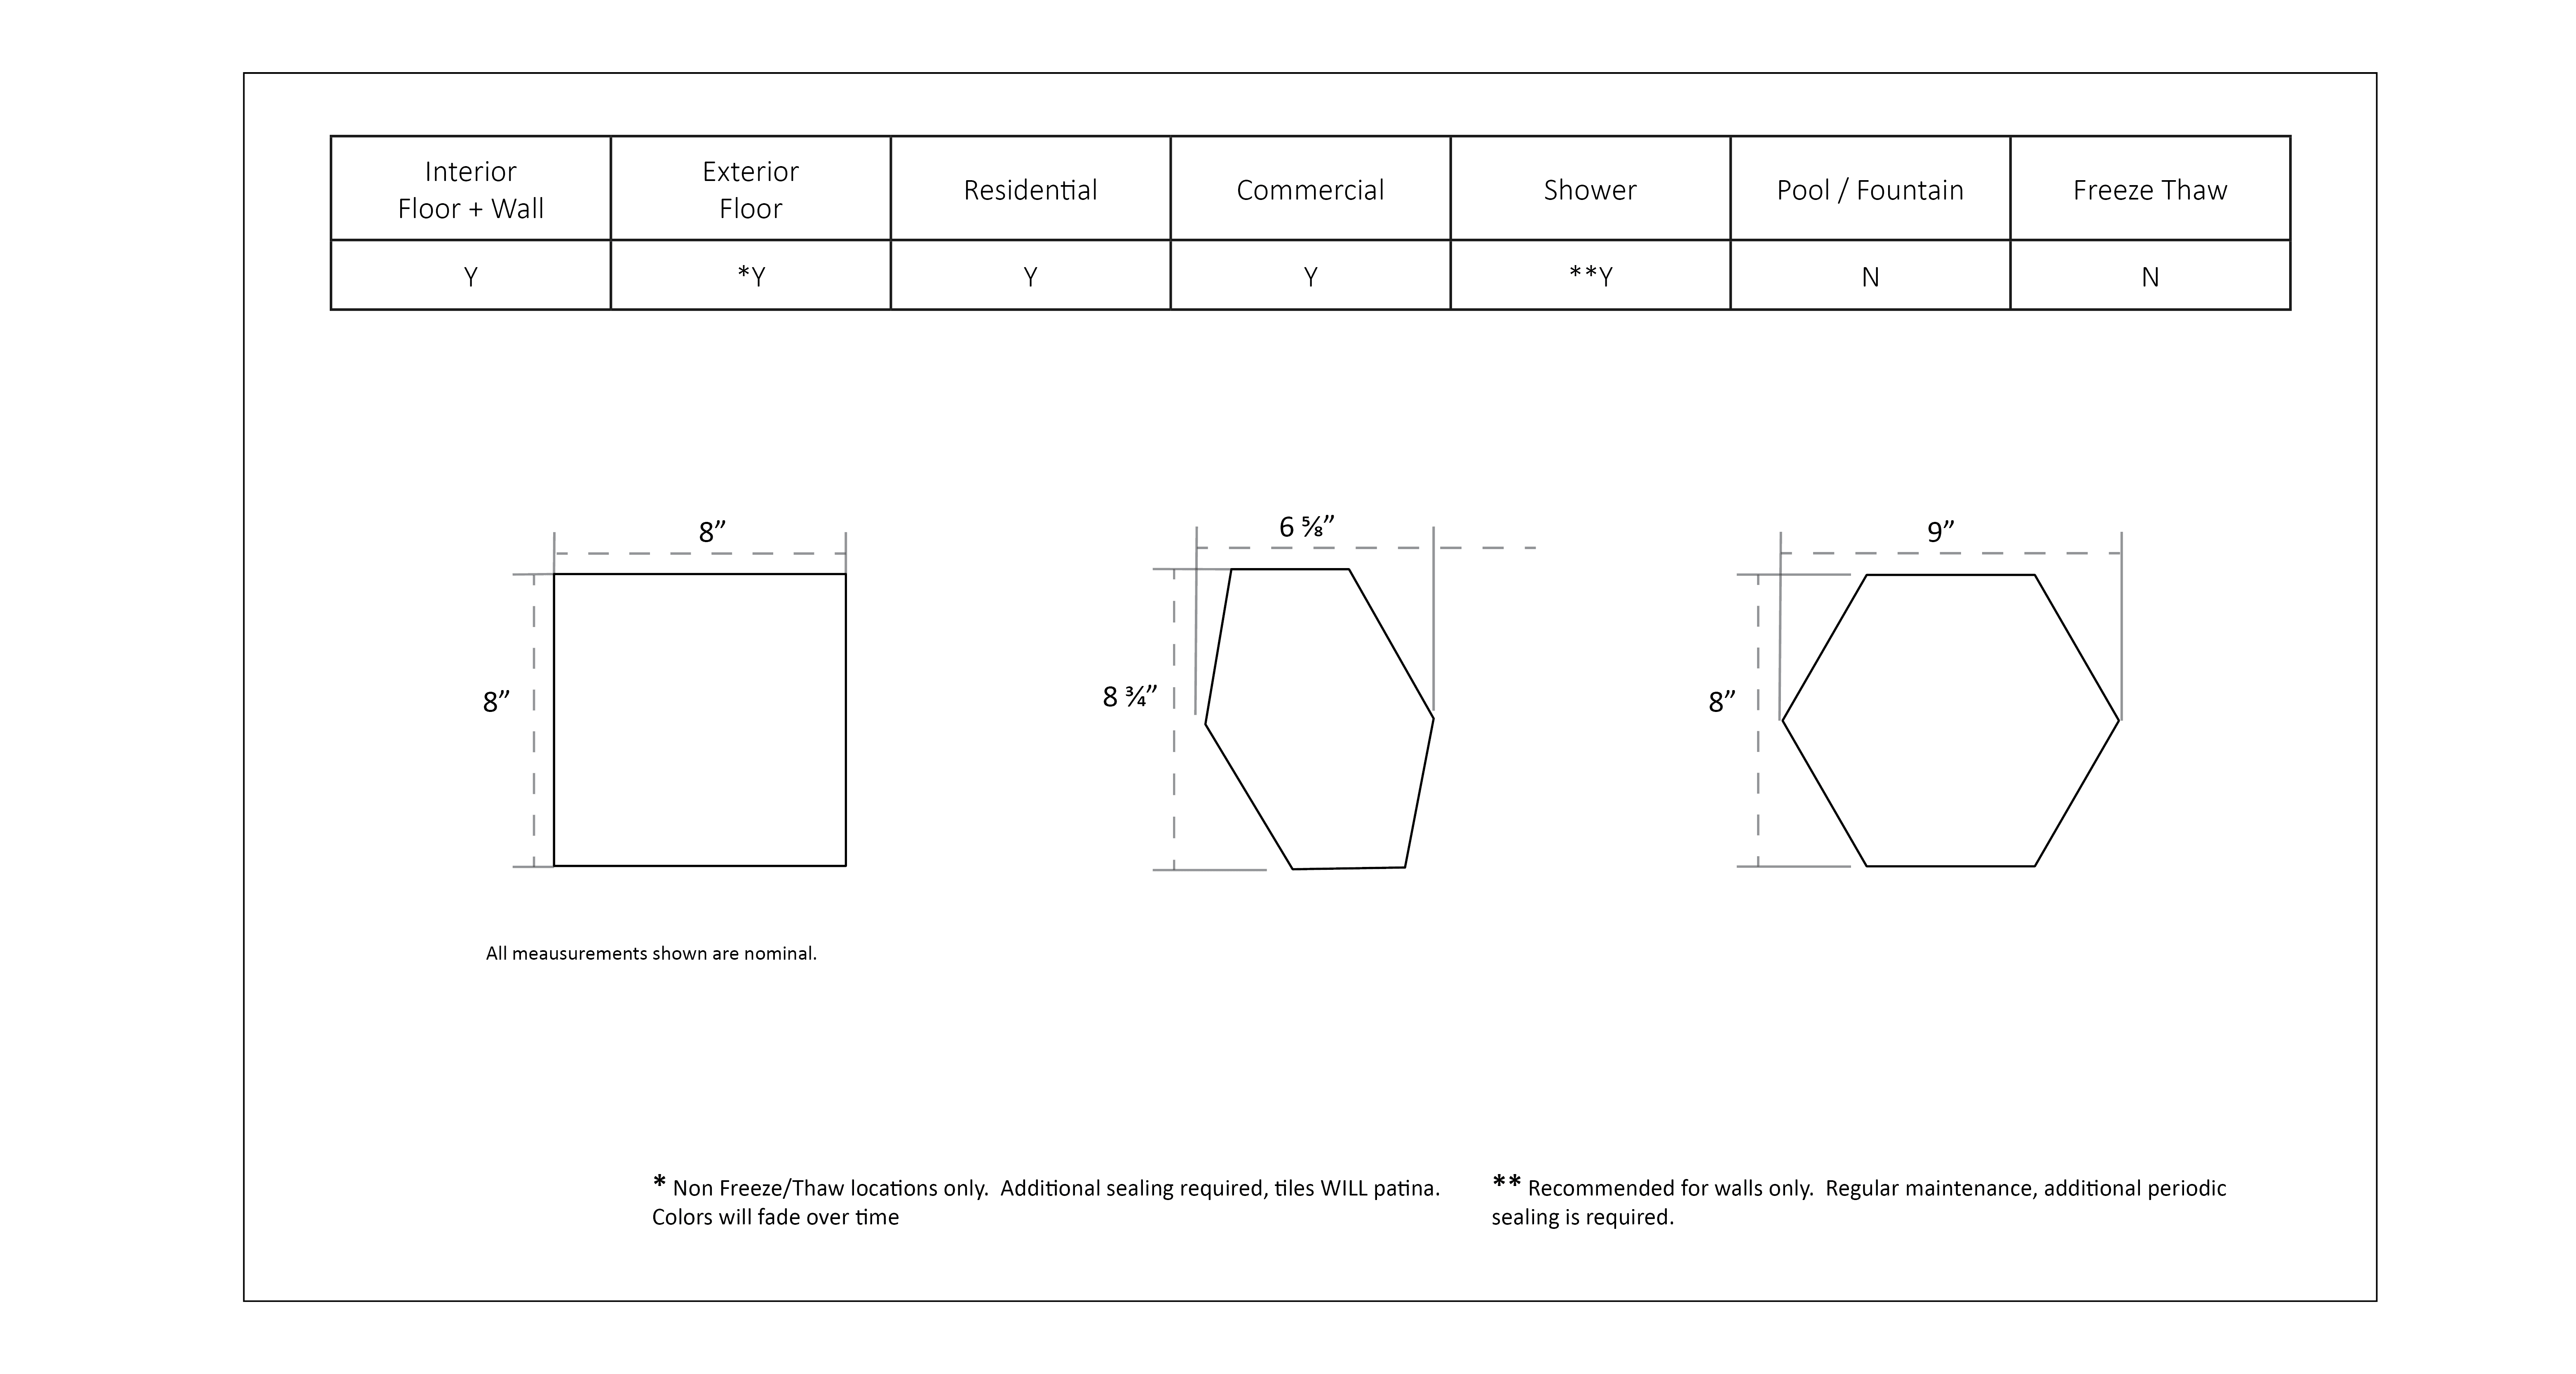
**IMPORTANT – Cement tiles are not freeze/thaw rated. Installation outdoors where freezing temperatures are present can cause damage to the tiles.
**YOUR INSTALLER is ultimately responsible for ensuring proper installation. INSTALLATION deems final acceptance.
INSTALLATION GUIDELINES
Our tiles may be cut easily with a water-cooled tile saw (wet saw) with a diamond blade. We recommend a high quality thinset mortar and a high-notched trowel (1/2”) to spread the adhesive on both the substrate and the back of the tile to ensure proper coverage and adequate adhesion. There are many reputable brands on the market, so we suggest consulting with your expert installer beforehand.
When using thinset mortar, the back of the tiles must be dampened prior to installation.
We recommend using your hands to level the tiles. Using a hammer or rubber mallet can damage the surface of the tiles and cause immediate and future cracking. Any residual setting material must be cleaned from the surface immediately.
Once the surface has been cleaned, you will need to wait until the mortar has completely dried before grouting or walking on it. Depending on the moisture content of your specific application and job site condition, this could be anywhere between 2-4 days. Follow the manufacturer’s instructions on the setting material.
GROUTING
Apply a coat of high quality penetrating sealer, following the manufacturer’s instructions, on the tiles BEFORE grouting. This is a very important step as it aids in the removal of excess grout and helps protect the tiles from staining during grouting.
We recommend using a light color grout, or a grout that most closely matches the background. Using a dark color grout can promote staining on the surface that could be very difficult to remove.
Recommended grout joint is 1/16” to 1/8”.
You may use a sanded or unsanded grout, but we DO NOT recommend using an Epoxy grout. Use a rubber float to install the grout, keeping it in as close proximity to the grout joints as possible. Smearing the grout over the entire surface will be more difficult to clean and can promote staining. Immediately remove any excess grout from the surface using a clean sponge and water ONLY. Do not use any acids or alkalines to clean the tiles.
Allow the grout to completely dry before applying s SECOND COAT of penetrating sealer. *HINT: if water or oil does not bead up on the surface or your tiles then the sealant was not applied properly.
**IMPORTANT – during a renovation when tiles will be installed and walked on before total completion, it is critical that the surface is protected. Use of colored plastic or cardboard can stain and damage the surface. Use of a breathable material, such as Builder Foam is recommended.
MAINTENANCE AND CLEANING GUIDELINES
A regular maintenance schedule will keep your tiles looking beautiful for many years. Vacuum or sweep regularly as abrasive dirt and materials can scratch the surface of the tiles. Mop floors regularly with warm clean water and a pH neutral cleaner. DO NOT use harsh chemicals that are acidic or alkaline. Clean any spill up immediately. Do not allow liquids to sit on the surface, as excess liquids can stain, pit, and crack the tiles. Most stains can be removed with a pH neutral cleanser, hot water and a soft bristled cleaning brush. Oil stains will be more difficult to remove. If you are having trouble removing stains, we suggest that you contact a local tile and stone cleaning & restoration professional.
Heavier traffic areas will require re-sealing of the tiles more often. Please consult your local professional if you are not comfortable with handling the stripping and re-application process.
Single coat re-application of the penetrating sealer is required once a year (depending on usage) in shower applications due to the continuous exposure to water.
Always follow the manufacturer’s instructions on application and use for whatever product you are using.
MORE INFO
These handmade cement and terrazzo tiles will patina naturally and high traffic areas will acquire a beautiful luster over time. Tiles installed outdoors will acquire a weathered appearance much more quickly than tile installed indoors. Colors will look faded and there will be crazing on the tiles. This is an intrinsic characteristic of all cement tiles and is to be expected and cherished! You may use a color enhancing sealer periodically to restore some of the original tones in the tiles.
**IMPORTANT REMINDER – Cement tiles are not freeze/thaw resistant. Installation outdoors where freezing temperatures are present can cause damage to the tiles. Use of these tiles outdoors is at the sole discretion of the owner/purchaser/installer. Architerra will not accept responsibility for any tile installed outdoors that exhibits what we constitute as acceptable aging.
For more detailed information and instructions about installing your tile, we highly recommend consulting the Cement Tile Manufacturers’ Association’s handbook. You may download it HERE. The Tile Council of North America also produces a very detailed publication called the TCNA Handbook for Ceramic, Glass, and Stone Tile Installation that is for sale on their website. You may find that link HERE.